How to Use a Mending Basket to Keep Small Repairs Together
A mending basket keeps an unfinished repair and its supplies together, so you can identify the next task and pick it up without searching drawers.
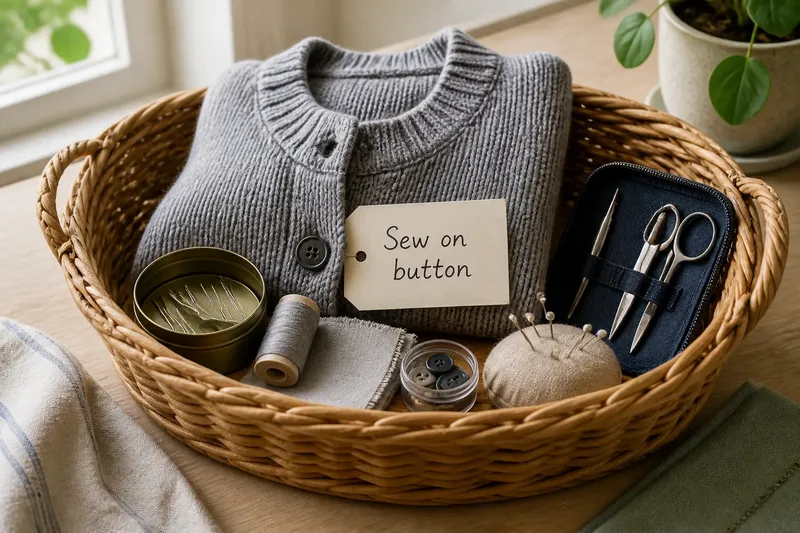
The common mistake with a mending basket is filling it with loose supplies but leaving each damaged garment elsewhere. Then a missing button, its thread, and the shirt that needs it become three separate things to track. Use the basket to hold a specific repair with the materials it needs, and it can keep small fixes from getting lost in household clutter.
A mending basket should hold work in progress
Treat the basket as a temporary home for repairs, not a general sewing cupboard. Put a garment or household textile inside with the supplies needed for its next repair. If the work is too large to fit, attach a note that identifies the item and the materials or action still needed.
A shallow basket, sewing box, or sturdy pouch can all work. Choose one that keeps small objects from spilling and lets you see what is inside. A basket is like a tray holding papers for one task: it helps only if unrelated items do not bury the work.
Match the contents to actual repairs
Keep a modest set of tools for the fixes you can handle: a needle case, suitable thread, small scissors, a needle threader, pins, and spare buttons. Add a patch or fabric scrap when a particular repair calls for it. Store needles and scissors in a closed case or tin so they do not snag fabric or poke through the container.
Before adding a supply, ask what repair it serves. If you cannot name a likely use, leave it in general storage rather than letting it take up space in the working basket. Follow care labels and tool instructions; ask a qualified professional about repairs to safety-critical items.
Keep each repair identifiable
A repair can stall because its materials are missing, but it can also stall because nobody remembers what needs doing. Keep each item paired with a short note when the next action is not obvious. Write something concrete, such as “replace the cardigan button” or “patch the knee,” rather than “fix this.”
Say you find a cardigan with a missing button while folding laundry. You put the cardigan in the basket with its matching spare button and a suitable thread, then add a note saying “sew on button.” The resulting answer is clear when you open the basket: the cardigan is the unfinished repair, and its next action and supplies are present. If the matching button is missing, the note instead says “find a matching button,” so you do not mistake the repair for ready-to-sew work.
Check the basket before adding or removing a repair
- Check whether an item has a specific defect, such as a loose seam or missing button; if the defect is clear, add the item with a note naming the repair, but if no repair is needed, return it to its usual storage.
- Check whether the required thread, button, or patch is present; if it is, keep that supply with the item, but if it is missing, add a note naming what must be obtained before sewing.
- Check whether the garment’s care label permits the planned method; if the method fits the label, proceed with the ordinary repair, but if the label rules it out or is unclear, choose a safer care method or seek qualified advice.
- Check whether needles and scissors are secured; if they are inside a closed case, leave the case in the basket, but if they are loose, put them in a case or tin before adding clothing.
- Check whether a repair is already complete; if it is, remove the garment and return it to its proper place, but if it is not, leave a note naming the next action.
- Check whether an item has sat in the basket because its repair is beyond your skill; if the fix is manageable, keep the needed materials with it, but if it is not, set it aside for a qualified repair service rather than letting it remain an unexplained task.
Answer the questions that help you set one up?
What belongs in a basic mending basket?
Start with a needle case, thread suited to the repairs you make, small scissors, a needle threader, pins, and spare buttons. Add patches or other supplies only when a repair calls for them.
Does a mending basket have to be woven?
No. A sewing box, pouch, or small lidded container works if it holds the current repair and keeps sharp tools contained. Pick a form that suits the items you need to carry.
How should I keep several repairs from getting mixed up?
Pair each garment with its own supplies and a short note naming the next action. If items cannot be kept separate inside the container, use individual cloth bags or place each repair in its own compartment.
What should I do with a repair I cannot handle?
Do not leave it in the basket without a plan. Note what needs attention and consult a qualified repair professional when the item or repair calls for skills you do not have.
A mending basket is useful when opening it tells you what is unfinished, what each repair needs, and what action comes next. Keep that information with the work, and the basket remains a repair tool rather than another place for things to wait.